

How to Tie a Chair Sash
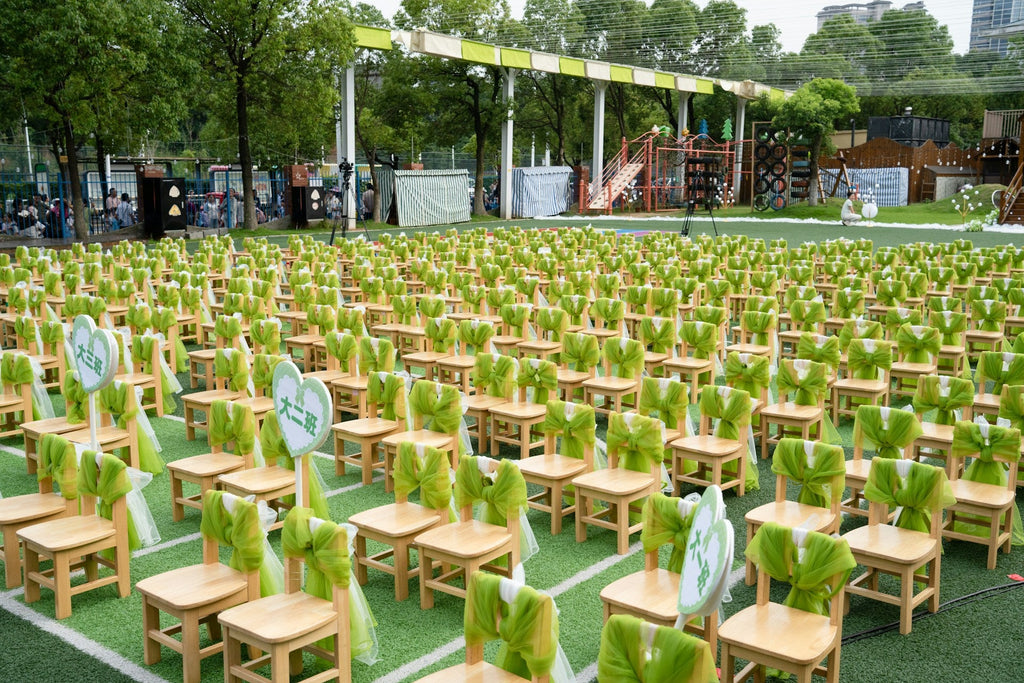
Quick Summary: Tying a chair sash is a simple three-step process - wrap the sash around the back of the chair, cross the ends behind or in front of the chair back, and finish with a bow, knot or rosette depending on the look you want. Most sashes are tied using a basic double-knot bow, but there are several creative alternatives, including side bows, rosettes and draped styles, that work well for different chair types and venue themes. Below, we walk through exactly how to tie a chair sash step by step, how to tie a chair sash without a bow, and how to adapt your technique for Chiavari, banquet and folding chairs - drawing on what we've learned supplying sashes to UK venues, stylists and wedding planners for years.
If you've ever stood in an empty function room and watched it transform the moment the chairs are dressed, you'll know exactly why chair sashes matter. A sash is one of the simplest, most cost-effective ways to inject colour, texture and polish into a venue, but the finished result depends almost entirely on how it's tied. A loose, lopsided bow can undo an otherwise beautiful setup, while a crisp, symmetrical knot pulls the whole room together.
As a UK wholesaler supplying chair covers, chair sashes and event linen to venues, stylists and wedding planners across the country, we're asked "how do you tie a chair sash?" more than almost any other question.
This guide covers the classic bow method, several unique ways to tie chair sashes, and practical adjustments for different chair styles, so you can get a professional finish whether you're dressing two chairs or two hundred.
Table of Contents
- How Do You Tie a Chair Sash?
- How to Tie a Chair Sash Without a Bow
- How to Tie a Chair Sash on Different Types of Chairs
- Different Ways to Tie Chair Sashes
- How to Make a Chair Sash Look Neat and Professional
- How to Choose the Right Chair Sash for Different Tying Styles
- Common Chair Sash Tying Mistakes to Avoid
- Conclusion
-
FAQs
How Do You Tie a Chair Sash?
To tie a chair sash, wrap it around the chair back, cross the ends, secure them with a knot, and then shape the finish into a bow, knot or other style.
Tying a chair sash is more about consistency than complexity. Once you understand the basic mechanics - wrap, cross, knot, shape - you can apply the same principle to a classic bow, a rosette or a draped finish. Getting this foundation right is what separates a professional-looking chair sash bow tutorial from a rushed, uneven one, especially when you're repeating the same tie across dozens of chairs.
What Do You Need to Tie a Chair Sash?
Before you start, it helps to have the right materials to hand. You'll need a chair sash long enough to comfortably wrap around the chair back with enough left over to tie (most 275–300cm organza or taffeta sashes are ideal for standard bows), a chair cover or chair back that the sash will sit against, and a flat surface or spare chair to practise on if you're working through the technique for the first time. If you're dressing a large venue, it's worth pressing or steaming sashes beforehand, as creased fabric is much harder to shape into a neat bow.
|
Item |
Purpose |
|
Chair sash (organza, satin or taffeta) |
The main fabric used to tie the bow, knot or rosette |
|
Chair cover or bare chair back |
Provides the base the sash wraps around |
|
Steamer or iron |
Removes creases for a crisp finish before tying |
|
Extra pair of hands (for bulk styling) |
Speeds up tying for large events |
How to Tie a Basic Chair Sash Bow
The most requested style, and the one most people mean when they ask "how do you tie a bow on chair" seating, is the classic centred bow. It's simple, symmetrical and suits almost every venue, from barns to ballrooms. Once you've mastered it, every other variation on this list becomes much easier.
How to Tie a Chair Sash Step by Step:
Follow these six steps for a clean, symmetrical finish every time.
1. Position the Sash Around the Chair
Drape the sash around the back of the chair, ideally just above the widest point of the backrest, keeping both ends roughly equal in length. Centering the sash here is the answer to how to put a sash on a chair correctly before you tie anything - get this positioning right and everything downstream is easier.
2. Bring the Ends Together
Pull both ends of the sash to the back (or front, if you prefer the bow facing forward) of the chair, keeping the fabric flat rather than twisted against the chair back.
3. Tie the First Knot
Cross the right end over the left and pull through to form a simple overhand knot, snugging it against the chair without pulling so tight that the fabric bunches.
4. Create the Bow
Form two loops, one from each end of the sash, and cross them over each other just as you would when tying a shoelace, keeping the loops roughly the same size for a symmetrical bow.
5. Adjust the Loops and Tails
Gently pull the loops to even them out and let the tails hang evenly below the bow, fanning the fabric slightly if you're using organza or a lighter material for extra volume.
6. Secure and Straighten the Sash
Give the knot a final gentle tug to secure it, then smooth the fabric down the chair back so the sash sits flat without twisting.

How to Tie a Chair Sash Without a Bow
Bow-free finishes are ideal for minimalist styling, tighter table layouts, or venues that want a softer, more relaxed look.
Not every event needs a traditional bow. A bow-free chair sash can create a cleaner, more contemporary finish while reducing bulk between closely positioned chairs.
How to Tie a Chair Sash Without a Bow Step by Step:
1. Tie a Simple Flat Knot
Wrap the sash around the chair back, cross the two ends and tie a single or double knot without creating any loops. Pull the fabric flat and allow the ends to hang vertically for a simple, understated finish.
2. Tuck the Tail Behind
Wrap and knot the sash as normal, then tuck one or both tails neatly behind the knot rather than forming a bow. This creates a more streamlined appearance and works particularly well for modern event styling.
3. Drape the Sash
For a softer look, drape the sash over the top of the chair back without tying it into a bow. Secure it discreetly with a suitable pin or clip if needed, particularly in busy venues where the sash could otherwise slip.
How to Tie a Chair Sash on Different Types of Chairs
Chiavari, banquet and folding chairs each have a different frame shape, so the same knot needs small adjustments to sit properly on each one.
The tying method stays broadly the same across chair types, but the shape of the chair back changes how the fabric falls. A method that looks perfect on a slim Chiavari frame can look bulky or uneven on a wider banquet chair, so it's worth understanding these small adjustments before you commit to styling an entire room.
How to Tie a Sash on a Chiavari Chair
Chiavari chairs have a narrow, often curved back, so sashes tend to sit slightly higher up than on a banquet chair. Keep the bow compact and the tails relatively short so the sash doesn't overwhelm the delicate frame, and consider a side bow rather than a centred one to complement the chair's slim silhouette.
How to Tie a Sash on a Banquet Chair
Banquet chairs have a broader, flatter back, giving you more room to work with. A fuller centred bow with longer tails suits this shape well, and it's the easiest chair type to practise your technique on, since the flat surface holds the fabric in place while you shape the loops. Our wholesale chair covers collection is specifically designed to pair with banquet frames for this reason.
How to Tie a Sash on a Folding Chair
Folding chairs often have a narrower, sometimes slatted back, which can make sashes slip if tied too loosely. A slightly firmer knot at the base of the bow helps the sash stay in place through a long event, and a simple loop-and-knot style (rather than a large bow) tends to sit more securely on this chair type.

How to Tie Chair Sashes: Different Ways to a Sash
From rosettes to draped finishes, there are several creative ways to tie chair sashes beyond the standard bow.
Once you've got the basic technique down, it's worth exploring some of the unique ways to tie chair sashes that stylists use to give a room a more distinctive look. These variations use the same core wrap-and-knot principle but change the finishing shape.
Classic Bow
The centred, symmetrical bow described in the step-by-step section above - timeless, versatile and suitable for almost any venue or theme.
Side Bow
Tied slightly off-centre to one side of the chair back, a side bow adds a softer, more relaxed feel and works particularly well on Chiavari chairs or for rustic and boho styling.
Double Knot
Instead of finishing with loops, tie two consecutive overhand knots stacked closely together for a sculptural, textured finish that suits satin or taffeta sashes with a bit of body.
Rosette
Gather the sash into pleats and secure it into a circular rosette shape at the centre of the chair back, either with a discreet stitch or a pin, for a more formal, tailored look often seen at black-tie events.
Loop and Knot
Wrap the sash around the chair, tie a single knot, then loop one tail back through the knot without forming a full bow - a tidy, secure option for busy venues or windy outdoor ceremonies.
Draped Sash
Rather than tying a knot at all, drape the sash loosely over the chair back and let it fall naturally down both sides, securing it lightly at the top with a clip or a single loose knot for an undone, romantic aesthetic.
|
Tying Style |
Best For |
Difficulty |
Ideal Chair Type |
|
Classic Bow |
Traditional weddings, formal events |
Easy |
Banquet, Chiavari |
|
Side Bow |
Rustic or boho themes |
Easy |
Chiavari, folding |
|
Double Knot |
Modern, textured styling |
Moderate |
Banquet |
|
Rosette |
Black-tie, formal receptions |
Advanced |
Chiavari, banquet |
|
Loop and Knot |
High-traffic or outdoor venues |
Easy |
Folding, banquet |
|
Draped Sash |
Relaxed, romantic styling |
Easy |
Chiavari, banquet |
How to Make a Chair Sash Look Neat and Professional
Small finishing touches, not just the knot itself, are what make a chair sash bow tutorial look venue-ready.
A technically correct bow can still look untidy if the finishing details are overlooked. Press or steam sashes before the event to remove packaging creases, and make sure every sash sits at the same height and tension across the room - inconsistent placement is one of the quickest ways to make an otherwise well-tied bow look amateurish. Fan out the loops and tails slightly rather than leaving them flat, particularly with lightweight fabrics like organza, and trim the tail ends at a clean angle if they're fraying. If you're styling a large venue, tying a handful of sample chairs first and taking a step back to check them from a distance - the angle guests will actually see - makes a noticeable difference to the finished room.

How to Choose the Right Chair Sash for Different Tying Styles
Fabric weight and finish directly affect how well a sash holds a bow, a knot or a rosette.
Not every fabric behaves the same way once it's tied, so choosing the right material for your chosen style matters as much as the technique itself. Lightweight, sheer fabrics like organza hold volume beautifully in loose bows and draped styles but can look thin in a tight double knot, while heavier fabrics like satin and taffeta give a fuller, more structured shape that suits rosettes and centred bows particularly well. If you want a symmetrical bow with real definition, a slightly stiffer fabric will hold its loops for longer through a full event without needing to be re-tied.
|
Fabric |
Holds Bows Well |
Best Tying Style |
Typical Use |
|
Organza |
Yes (light, airy) |
Draped sash, side bow |
Weddings, ceremonies |
|
Satin |
Yes (structured) |
Classic bow, rosette |
Formal receptions |
|
Taffeta |
Yes (crisp) |
Double knot, classic bow |
Statement styling |
|
Lace |
Moderate (textured) |
Loop and knot, drape |
Vintage or rustic themes |
Our full chair sashes collection and dedicated sashes and bands range cover all of these fabric types, so you can match the material to the style you're planning before you buy in bulk.
Common Chair Sash Tying Mistakes to Avoid
Most uneven or loose-looking chair sashes come down to a handful of avoidable errors.
Small mistakes can make chair sashes look untidy, uneven or less secure than intended. Taking a little extra care when preparing and tying each sash will help create a polished, consistent finish across every chair.
-
Tying the knot too loosely: A loose knot can cause the sash to slip or the bow to sag during the event, particularly on folding chairs. Pull the sash snug before securing it.
-
Leaving uneven tails: Uneven ends can make even a well-tied bow look lopsided. Check the length of both tails and adjust them before finishing the bow.
-
Skipping the pressing: Creased or wrinkled sashes can look untidy and show up clearly in event photography. Press or steam the fabric before tying the sashes.
-
Rushing the setup: When dressing a large number of chairs, it's easy for the height, knot position and bow size to vary. Periodically step back and check several chairs together to maintain a consistent look.
-
Using a sash that's too short: A sash designed for a slimmer chair may not provide enough fabric to create a full bow around a wider banquet chair. Check the sash length and chair width before ordering to ensure there's enough fabric for the style you want.
Conclusion
So, whats the secret when considering how to tie chair sashes? Tying a chair sash well comes down to consistency, the right fabric for your chosen style, and a handful of small finishing touches that most people overlook. Whether you're after a classic bow, a bow-free finish, or one of the more creative ways to tie chair sashes covered here, practising on a single chair before you style the whole room will save time and keep every sash looking uniform on the day.
If you're planning a wedding or event and want to explore fabric options, browse our full range of chair sashes and wholesale chair covers, or read our related guide on wedding chair sashes: ideas, styles and how to use them for more venue styling inspiration.
FAQs
How to tie chair sashes?
A chair sash can be tied in several ways depending on the look you want. The simplest method is to centre the sash around the chair back, bring both ends around to the front or side, and tie them into a bow or knot. For a fuller bow, allow enough fabric at each end to create the loops and tails without pulling the sash too tightly. Always check the sash sits securely and evenly before styling the bow.
How do I tie a chair sash without a bow?
Tie a single flat knot and tuck the tail behind it, or drape the sash over the chair back and secure it lightly with a clip rather than knotting it at all.
What's the easiest way to create a sash bow that looks symmetrical?
Keep both loops the same size as you cross them, and give the finished bow a gentle central tug so the knot sits centred before smoothing the tails down.
Can I tie chair sashes on Chiavari and folding chairs the same way?
The core technique is the same, but Chiavari chairs suit a more compact bow while folding chairs benefit from a firmer knot to stop the sash slipping during the event.
What fabric is best for tying a chair sash bow?
Satin and taffeta hold structured bows well, while organza is better suited to looser, draped styles thanks to its lightweight, flowing texture.
How much fabric do I need to tie a chair sash?
Most standard chairs are comfortably covered by a sash between 275cm and 300cm long, which leaves enough length for a full bow with even tails.
What are some unique ways to tie chair sashes besides a bow?
Rosettes, double knots, side bows and draped finishes all offer a different look from the classic centred bow while using the same basic wrap-and-knot technique.
-
Posted in
Chair Decor, Chair Sashes, corporate events, wedding decor